
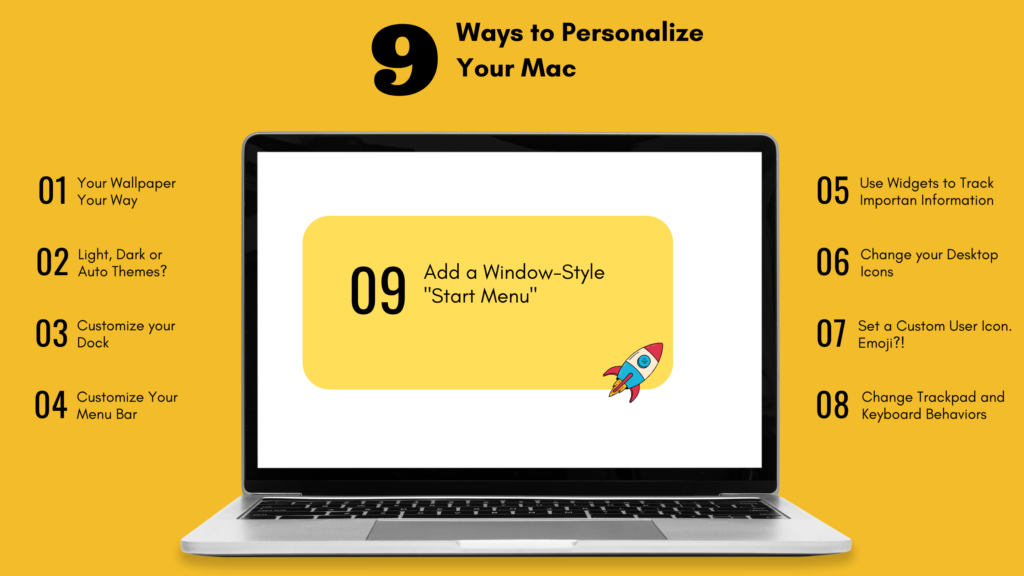
You got yourself a Macs desktop but everything is looking a little too cookie cutter for you. If you’re like most people, If you’re like most people, you spend hours upon hours each day sitting in front of your computer. Why not make that time more enjoyable by customizing your Mac’s desktop to fit your unique style? In this blog post, we will discuss 9 different ways that you can customize your Mac desktop and make it your own. Let’s get started!
1. Add a wallpaper that speaks to your personality
One of the easiest ways to customize your Mac desktop is to change the wallpaper. This can be done by simply going to your System Preferences > “Desktop & Screen Saver.”
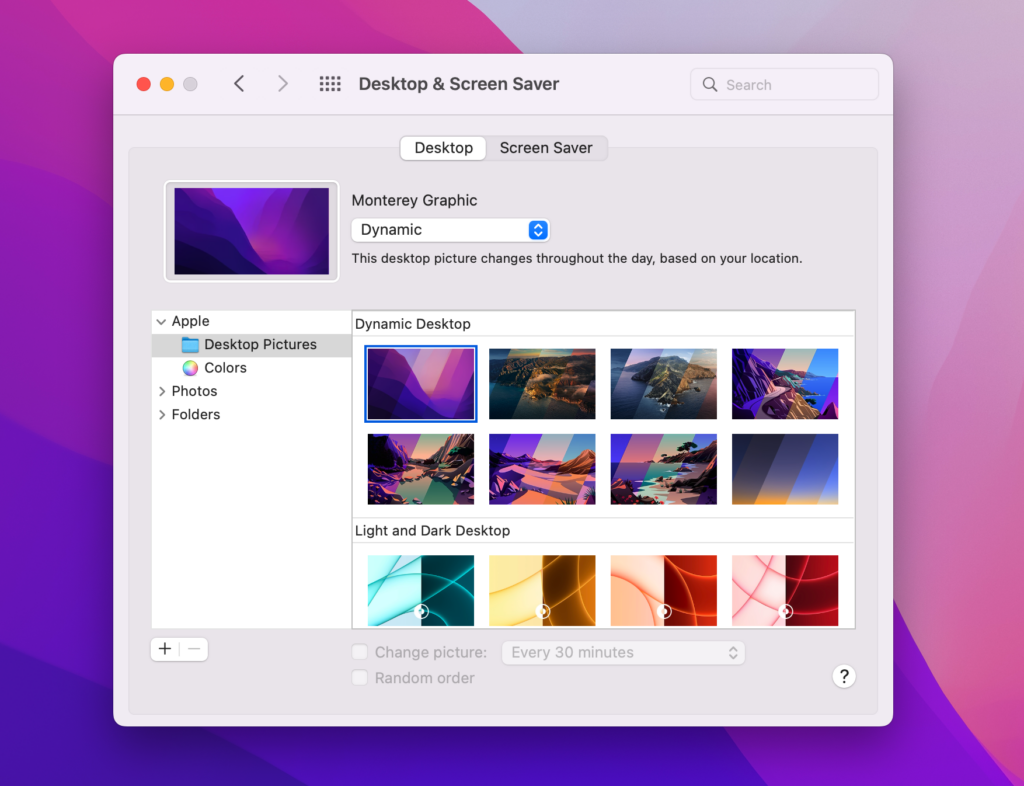
From there, you will see a variety of different built-in wallpapers that you can choose from. If you’re looking for something more unique, you can always select “Folder” from the left sidebar and choose a folder of your own personal photos.
If you want to take things a step further, you can use a program like Photopea to create your own custom wallpaper. This is a great option if you’re looking for something truly unique that speaks to your personality. Once you’re satisfied with your creation, simply save it to your computer and follow the steps above to set it as your wallpaper.
2. Change Themes: Choose between light, dark, and auto
Another easy way to customize your Mac’s desktop is to change the theme. This can be done by going to your System Preferences > “General.” At the top of the window, you will see three different options for themes: light, dark, and auto. The light theme is the default option and uses a white background with black text. The dark theme uses a black background with white text. And the auto option switches between light and dark depending on the time of day.
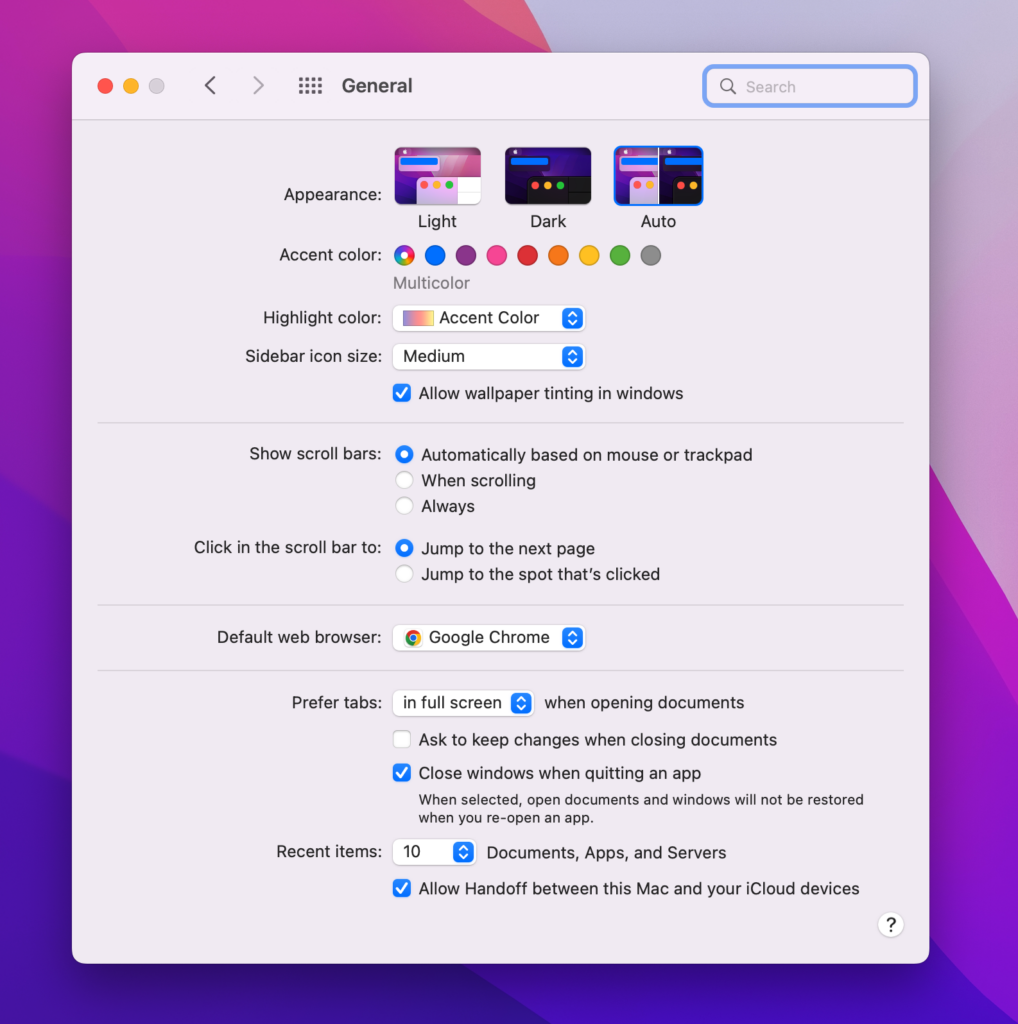
If you’re looking for something a little more unique, there are a variety of different themes that you can download from the internet. Once you’ve downloaded a theme, simply double-click it to install it and then from your System Preferences > “General” then click on your custom “Appearance” from the list.
3. Customize your Dock
The Dock is your go-to when it comes to accessing and seeing your favorite applications and is the most functional aspect of your Mac desktop – it’s definitely worth taking some time to customize to make it your own.
Remove Apps from the Dock
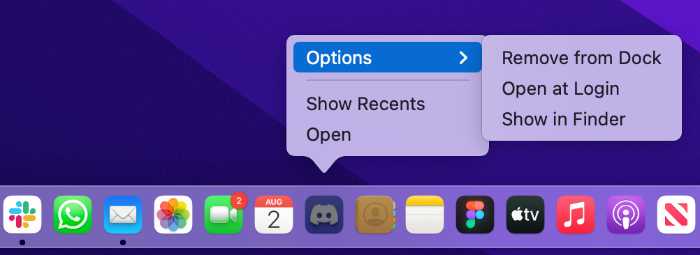
When you first boot up you’ll notice that there are a number of default applications Apple as preloads a number of apps onto the dock. So, the first thing you’ll want to do is remove application icons you do not plan on using – you can do this two ways: Right-click on any application > “Option” > “Remove from Dock”. OR left click on the icon > drag it to the desktop > release. If one option doesn’t work use the other.
Changing the Position and Size of your Dock
The next change you might want to consider is changing the position and size of your dock, this is especially useful to ensure you adjust it to your comfort level and working style. Additionally, you can also find nifty options like being able to remove “Recent Applications”, hiding the dock, and changing the opening animation of apps. To get started go to System Preferences > “Dock.”
Adding Frequently-used Folders to your Dock
If you want to add folders that you frequently access to your dock you can do this by adding them to the far right (bottom) section of your dock. Most of us hide folders in “documents” or other sections on the Hard Drive that are hard to find. So I’ll provide an explanation for the most likely scenario, if you have it on your desktop skip this step.
Open up Finder, you can locate that on the far left corner of your dock looks like this:

Find your folder > Left Click and Hold on the icon > Drag to the far right section of your dock > release. If you were successful it should look like this:

The folder will open up in an accordion fashion and you will be able to select from files within the folder. To change how that folder is displayed (choose from Folder and Stack views, with the option to expand the folder in a List or Grid view). To remove a folder from your favorites: Right-click on the folder > Options > Remove from Dock.
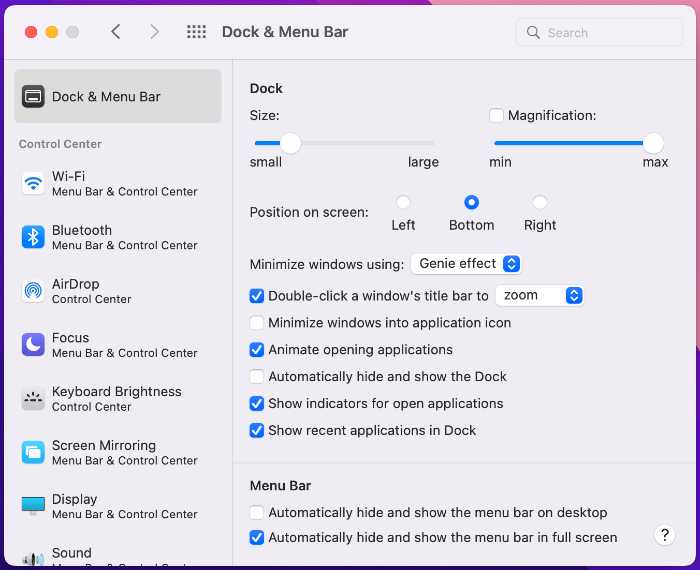
4. Customize your Menu Bar
The menu bar is at the top of your screen and provides you with useful information such as “Battery Life”, “Bluetooth”, “Wi-Fi”, and “Date/Clock”. On the left-hand side of the bar, you will find app-specific functions. This will change depending on the app you have opened.

To access your menu bar settings go to your System Preferences > “Dock & Menu Bar” on the left-hand you can scroll down to view the various control center options that are active. To change the clock you scroll to the bottom and click on “Clock” there you will be able to change options such as “Show AM/PM”, “Use a 24-hour clock” and change the time options to Digital/Analog.
You have other interesting options like AirDrop, this will make it easier to AirDrop files, or Bluetooth to be able to quickly manage what Bluetooth device that you are connected to.
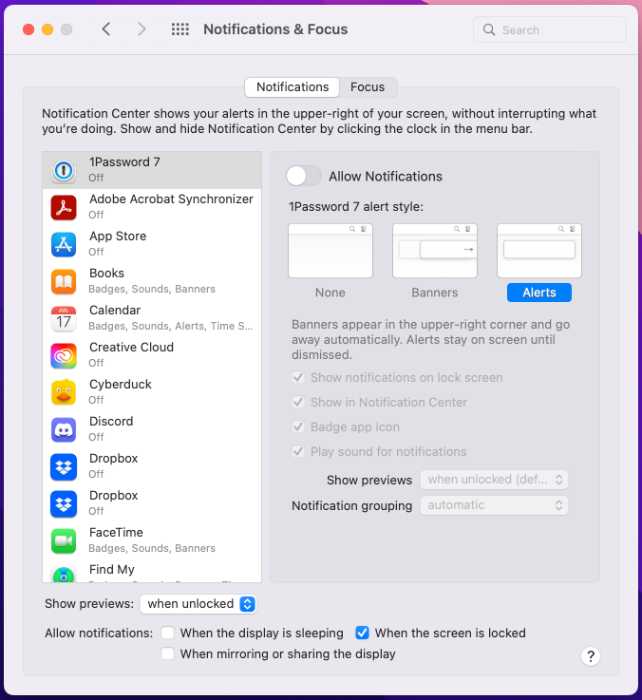
Customize your Notification Center
If you click on the “clock symbol” you’ll notice a drop-down this displays your notifications. One of the best ways to customize your Mac is to add widgets to your Notification Center. This can be done by going to your System Preferences > “Notifications & Focus.” Here, you will see a list of all the apps that have notification capabilities. You can choose how you want to be notified for each app (e.g., banners, alerts, or badges), as well as whether or not you want the app’s icon to show up in the notification center. To add a widget, simply click on the “+” sign and select the widget you want to add.
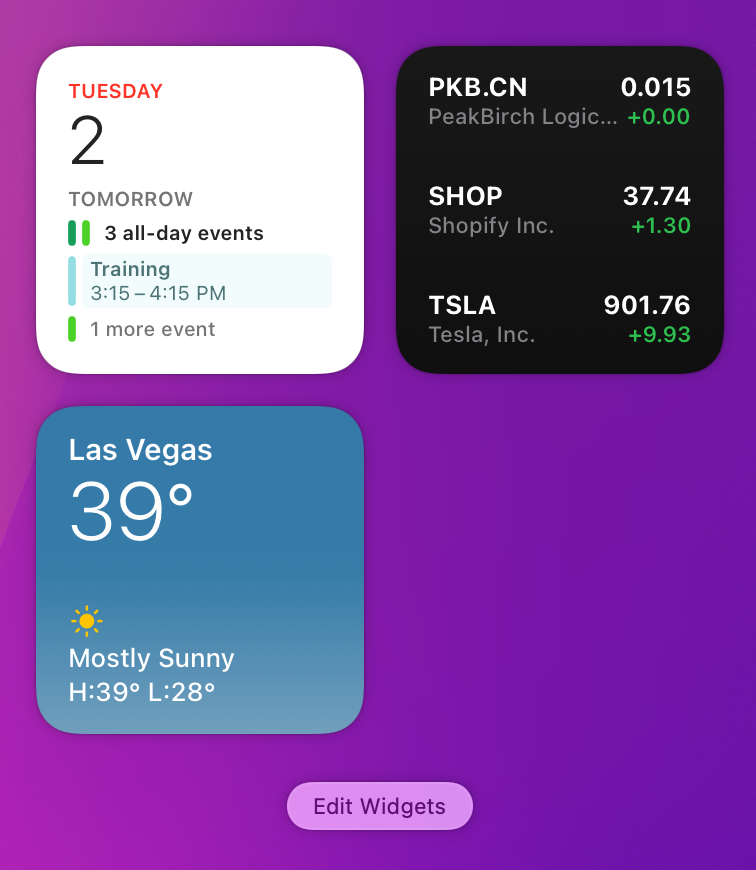
5. Adding Widgets to Track Important Information
macOS widgets give you a quick glance at information that is important to you such as stocks, news, weather, and more. To edit the widgets being displayed click on the “clock/date” (drop down will appear) > “edit widgets”. If you are using a trackpad you can access the notification center by swiping with two fingers from the edge of the trackpad.
To add a widget you click the desired widget and “+” to add it you can also customize the way it looks in your notification center. To remove a widget click on the “-” next to the widget. The left side shows options for widgets available and the right side shows you active widgets.
6. Remove or Change Your Desktop Icons
If you want to quickly clean up the way your desktop looks and remove all your Desktop icons, open up Terminal and type the following code line: (for quick terminal access click and hold “Command” and then hit the “Space Bar“.
defaults write com.apple.finder CreateDesktop false; killall FinderYou can revert the changes back by changing false to true in the above command.
How do I get the Macintosh HD icon on my desktop?
To add the Macintosh HD icon to your desktop open up finder than on your menu bar click on “Finder” > “General Tab” > check the box next to Hard disks. This will display your Macintosh HD icon on your Desktop.
7. Set a Custom User Icon
To add a custom image to your user icon go to System Preferences and click on the image next to your name, this will open up an edit screen. This will give you options to pick between a picture of yourself or pick from a list pre-populated “Memoij” or “Emoji“.
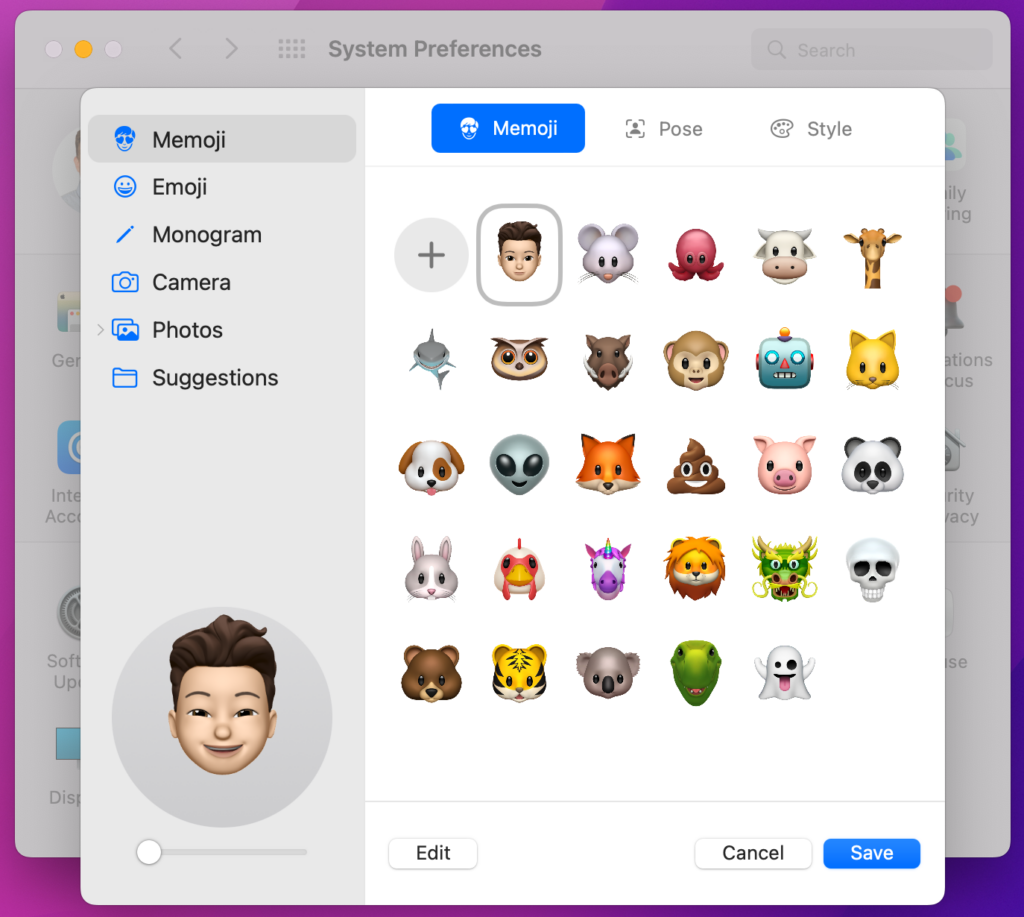
Select the icon of your choice and hit Save to get the selected picture in place.
8. Change Trackpad and Keyboard Behavior
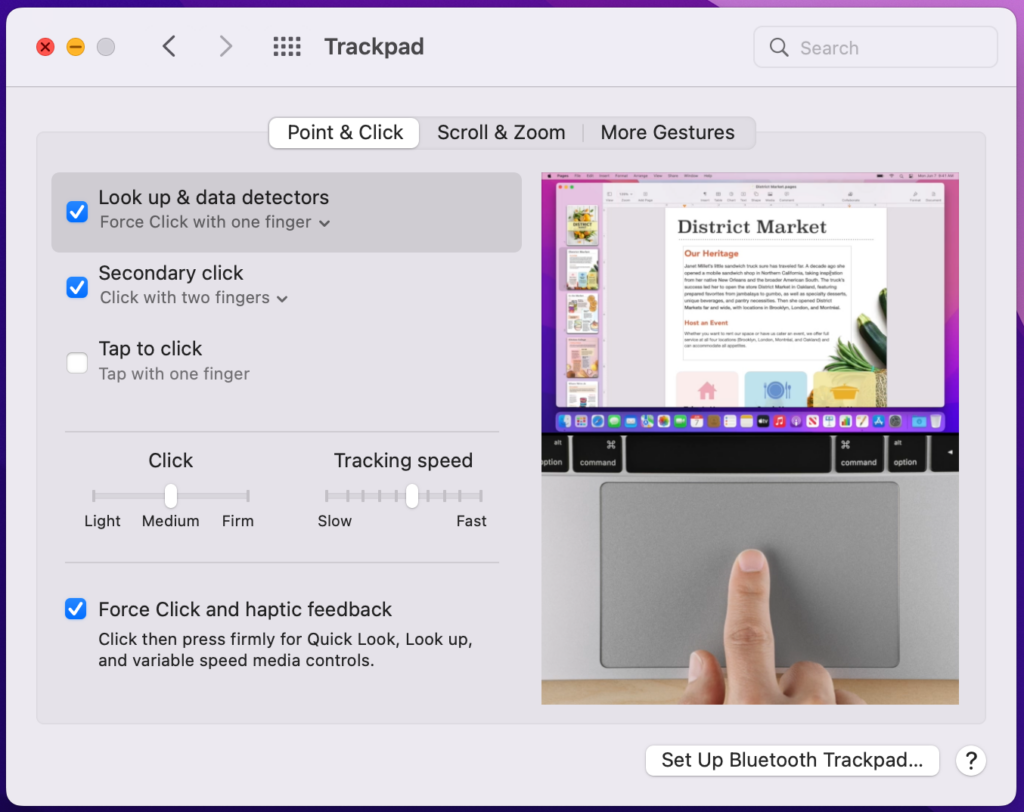
Adjusting your Trackpad
Working styles differ for everyone so if you want to make some adjustments to the behavior of your laptop’s trackpad then go to System Preferences > Trackpad. Here you will find a number of options like “secondary click” if you’ve used trackpads it can get pretty frustrating at times with the secondary click. We would recommend enabling this option. If you want to adjust the sensitivity of your trackpad you can do so here as well by toggling the bar left or right to adjust the speed.
The section “More Gestures” is useful as it shows you what each gesture does to reach shortcuts, you can display them if you accidentally trigger them.
Adjusting your Keyboard
There is a number of endless reason to customize the keyboard experience, if you are like us and are happy with the defaults, leave it alone. However, if you want to fine-tune your macOS keyboard experience go to System Preferences > Keyboard. Important some of the accessibility settings are only applicable to mac laptops, e.g. “Adjust keyboard brightness in low light” and “Turn keyboard backlight off after“.
If you type a lot like yours truly and are comfortable using text editing shortcuts e.g. Shift+Arrow keys to select text. We would recommend jacking up the repeat speed and having shorter delays.

9. Add a Window-Style “Start Menu”
If you’ve come to macOS from Windows and are looking to jazz up your start menu experience with a Windows like start menu, help is at hand. You can use uBar (free to try, $30) to completely replace the Mac dock with the familiar Windows-like interface you’re used to. The bar can be deployed across multiple monitors and makes it easier to view browsers opened. Other great features includes quick launch icons, currently-open apps, and grouped windows. You can even hover to preview grouped windows.

The app may command a premium price, but if you simply can’t get used to Apple’s way of doing things it’s a small price to pay to get your productivity back.